troye
jack and finn harris - jacks gap
zoellea
macbarbie07
sam pepper
casper lee
thatcher joe
pointless blog
comment your favourite's below
Friday 22 November 2013
How to do A waterfall braid
Prepare hair for braiding. Hair braids best when it is damp, clean and fully brushed before braiding.
Part your hair in the middle.

- Wash and condition your hair. Remove excess water using a clean towel. The braiding will be most successful if you don’t fully dry your hair.
Brush out any knots with a wide tooth comb. Brush underneath the nape of the neck to ensure no knots remain.
Part your hair in the middle.
spaceplay / pause
escstop
ffullscreen
shift + ←→slower / faster (latest Chrome and Safari)
↑↓volume
mmute
←→seek
. seek to previous
12…6 seek to 10%, 20%, …60%
Section off the top third of your hair. Begin sectioning from your forehead and part. Use the wide tooth comb to section off your hair and hold the section in one hand.
- Divide the section into three parts Braid the hair toward the back of your head in a French braid style. After the first pass, begin working outside pieces of hair into your braid so that you're essentially French braiding your hair. Create that “waterfall” look. When you’ve reached the last part of the first braid section, drop the last strand of hair. This will make it look like the hair is cascading from the braid. Pick up a new strand of hair located next to the strand you’ve dropped to replace that strand. Continue the waterfall look by picking the next section of hair located beside the hair section you dropped and continue braiding.
- Continue braiding by cascading the braid toward the middle of the head. Repeat the initial step by continuing the braid and then dropping the last section of hair, but then picking up a section next to the dropped hair section. Secure the braid with bobby pins if needed. Keep bobby pins on hand to provide additional support or to keep errant hair in place. Braid the remaining “tail” until you run out of hair Decorate. Finish with a small hair tie or clip that matches your outfit. Do not use an office rubber band as it will get stuck in your hair and damage it, but orthodontic rubber bands work well. Depending on the event, you could either integrate a matching clip or hide the hair tie into your tail by choosing a tie in the same color as your hair.
from wiki how
Sunday 13 October 2013
Trend alert : jelly sandals
 Clockwise from top right: Jelly gladiators, £8, from New Look; Pink gladiator sandals, £9.75, from Asos; See by Chloé Yellow sandals, £73, from Net-a-Porter; Electric blue gladiators, £10, from Topshop; Melissa + Zaha Hadid sandals, price unknown; Green Marni sandals, £80; Men's jellies (shown in red and clear), £8, from Asos; Flip-flop style coral jelly sandals, £8, from New Look. Jelly graphic: image source here. SS
The retro, quirky shoes have been revamped to come in a variety of standout neon colours for those who are daring. Or you can keep the look simple by selecting in a shiny black or transparent pair.
09
Sunday 6 October 2013
Spring shoe trend
Trend: Jellies
Windsor SmithCove, $39.95, TheIconic
Jelly Beans, Pink, $34.99, TheIconic
Juju Babe, Pale Blue, $45.30 ASOS
Jelly Beans, Pink, $34.99, TheIconic
Juju Babe, Pale Blue, $45.30 ASOS
The Trend: Pretty prints
New Look Wide Fit Testing Printed Wedge Shoes, $36.22, ASOS
JONAS Espadrille Sandals, $27.18, ASOS
Trend: a touch of sparkle
HYPER Glitter Two Part Sandals, £28, Topshop
Petra Yellow Metallic Pink, $109.95, Styletread
ASOS VOLLEY Glitter Flatforms, $54.36, ASOS
Petra Yellow Metallic Pink, $109.95, Styletread
ASOS VOLLEY Glitter Flatforms, $54.36, ASOS
Trend: the block heel
RESCUE Fringe Sandals, £68, TOPSHOP
JAMBOREE Multi Strap Sandals, £65, TOPSHOP
SPURR Agi T-bar Heels, $49.95, TheIconic
Skin Sienna, $169.95, TheIconic
The trend: White soles
Wednesday 18 September 2013
Two hearts bracelet
Valentines is approaching … ok ok .. maybe I exaggerate a bit, ‘but I’ve got lost in the air romantic and I thought of a thin thin bracelet with two hearts soooooo romantic …

To do this, take the golden thread and cut 3 cm. Fold it exactly in half and started to bend the two ends.

For better orientation started by one of the parties, then you can do so by making the second match exactly with the first.

Once prepared the two hearts incastrateli the one with the ‘other. At this point you just have to add the chain and tie and your bracelet is ready!


Monday 16 September 2013
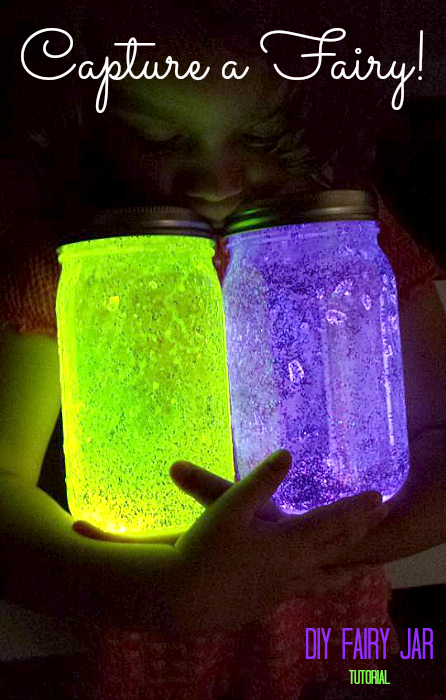
DIY Fairy Jar “HOW TO” Tutorial
Items:
- Mason jar(s)
- Glitter (diamond glitter works best)
- Glow stick(s)
- Serrated knife

Step 1: Decide which color glitter and glow stick you are going to want in the jar.
Step 2: Cut open the bottom of the glow stick on a towel (as not to get the fluid all over everything; you could also elevate the glow stick on the lid of the jar).
Step 3: Dump the contents of the glow stick into the jar. BE CAREFUL! To my surprise, I found that the inside of the glow stick is in fact, glass.
Step 4: Once you’ve done that, grab the glitter and dump it into the jar on top of the glow stick contents. The amount of glitter is going to depend on the size of your jar, how sparklie you want it, and what glitter you decide on. I used about half of one glitter container I bought. If the glass from the glow stick did not brake upon dumping it into the jar, you can break it now by hitting it with the end of the knife.
Step 5: You can now put the lid on!! Make sure it is on very tight, and shake it up like crazy.
Now that you now know how to make a “fairy in a jar”, you can use them to decorate your childs room at night, a deck outside, the yard, your bathroom when you’re taking that candle lit bath, or whatever else you may think up!
P.S. They only last about 8 hours.
Monday 26 August 2013
DIY Bag


Step 1: Get your supplies ready. You’ll need an old leather bag, acrylic craft paint, fine sand paper, a rag or paper-towel, alcohol, water, painter’s tape and maybe some newspaper for your workspace if you like to get messy.
Step 2: Sand your bag until the surface is dull. Look for any shiny areas and concentrate on them until they look matte. This well give the paint a good surface to really stick on.
Step 3: Add some water to a rag or paper towel and lightly wipe off the residue.
Step 4: Apply rubbing alcohol onto a rag or paper towel and apply it all over your bag. This will prep your piece for paint.

Step 5: Tape off sections of the bag you want to paint. You can be creative and do a stripe down the middle, a chevron print, color-block, whatever you like.
Step 6: Select your colors! Have fun with neons, try pastels, you can even do glow in the dark if you want. These paints only cost about a dollar each at Michael’s.
Step 7: Finally time to paint! Start of with a light wash of color. If your bag is dark apply a base of white paint first. Try to keep your brush strokes uniform.
Step 8: Let each coat dry for a couple of minutes and paint until the desired opacity is reached.
Not shown: Seal your work with a layer of Modge Podge or clear acrylic spray paint.
FROM http://www.tresdope.com/2012/06/08/diy-revamp-old-bags-with-paint/
Monday 19 August 2013
Some Sweet Things
You were my life jacket when I fell out of the boat and floated away...
When you have a crush on someone, you notice every single detail about them, no matter how small. And when they do something for you, you feel so touched even if it was the most simple thing in the world.
A smile from him alone can change my day. Just one simple smile and that look in his eyes that can take all the pain away...
Rejection: one word full of so much heartache. All the hopes you had, now are vanished into oblivion. All that self esteem you had, now plummeting back down to zero. All that love you felt, now broken into a million pieces.
We talked, we laughed, we had good times. Now we don't talk, don't laugh, and don't have a good times, all because you thought of nothing but yourself.
The actual growth in a person's life is the rise in his wisdom and not the raise in his pay or income.
Beautiful is a person whose outside and inside world are in great concord, camaraderie and concert.
Time decides who you meet in your life. Your heart decides who you want
in your life. But your behaviour decides who will stay in your life.
A bird sitting on a tree is never afraid of the branch breaking, because her trust is not on the branch but on its own wings!
Kindness is the only language the deaf can hear and the blind can see.
Maybe I could try a bit harder, you could stay up a
bit longer we could make this work. Or maybe we should stop pretending,
we both know we're hurting, maybe it's time to go.
Popularity doesn't matter. When you are looking for a
job, your employer isn't going to ask you if you were popular in middle
school!
That moment when someone gives you a compliment and you feel like you love that person even if you haven't met them.
Remember that everyone you meet is afraid of something, loves something and has lost something.
A relationship is not based on the time you've spent together, but the foundation you've built together.
Success lives with no address as people keep searching it in spite of making any amount or level of progress.
I've lied once. You've lied how many times? I don't know. I've lost
count. I've broke one promise, you've broke many. So I think you should
forgive me considering how many times I've made the mistake of forgiving
you. I shouldn't have forgave you.
Sometimes, I want to be a child again because they don't have to deal
with serious problems. But unfortunately, that is very impossible. I
just wish that I will have enough patience and courage to face all the
problems and situations that I have to deal right now.
When life gives you lemons, sell those lemons and make some money. Making lemonade isn't going to get you anywhere.
When I am alone, I tried to reminisce my past actions and decisions in
life. It makes me think that I should be better on that, but I don't
regret any of those moments because it makes me a better person now and
in the future.
The past is where you learned the lesson. The future is where you apply the lesson. Don't give up in the middle.
The Fault in our stars book review
the Fault in Our Stars is written from the perspective of 16 year old
Hazel Lancaster who suffers from terminal lung cancer. She meets
Augustus Waters, who is recovering from osteosarcoma, at a Cancer Kid
Support Group.
Although this is a book about cancer, it is not a cancer book. It is not your typical 'tragic' book and frankly, I think it is a lot more than that..
Like a lot of John Green's books, this has the theme of the value of youth and life running throughout it. Despite the fact that in its essence it is a love story, it is more than that. It is a short-lived tale of friendship and it really does emphasis how short life is. Spoiler alert: it is extremely likely you will cry and/or be speechless at the end.
I rate this book 9.5 out 10 because it is definitely my favourite book and is great if you are a teenager that is not afraid to cry. The film of this book is also being released next year so you should definitely read this before watching it!
Review: Polyvore
http://www.polyvore.com/
Polyvore, is a website it is also and app, that you can get on I-Phones and I-pad's.
Kids/teens/adults can learn about recent style trends through Polyvore's user populated fashion site. Polyvore also gives teens the chance to practice self-expression and communication; you can post comments and answer user what-to-wear questions. However, it doesn't delve too deep into educating users about how the fashion industry works -- offering a primer on fabric types, for example. Polyvore encourages creativity and experimentation with fashion and trends.I think polyvore is fun, its really good because you can See what items of clothing go with each other.
My polyvore user name is : madeleine-web-224
I would rate it 4/5
★ ★ ★ ★ ☆
Tuesday 6 August 2013

Sunday 4 August 2013


Thursday 1 August 2013


Friday 21 June 2013
How to Get a Faux-Bob, like Taylor Swift and Vanessa Hudgens
Feeling a little bored with your locks, but not ready to chop
them off? We've got the perfect compromise: a chic, faux-bob that only looks like you've gone short. Eugene Smith, a New York-based Ted Gibson
celebrity stylist whose clients include Naomi Campbell, Beyonce, Hilary
Duff, Mandy Moore and Zoe Saldana, shows us how it's done.

 This hairstyle works best on wavy hair, medium-to-long length. You’ll
need approximately 45 minutes to recreate the look and the recommended
products and tools are:
This hairstyle works best on wavy hair, medium-to-long length. You’ll
need approximately 45 minutes to recreate the look and the recommended
products and tools are:· Shine Serum
· Blow Dryer
· 2-inch Round Brush
· 1-inch Barrel Curling Iron
· Bobby Pins
· Hair Elastic
· Ted Gibson Build It
· Ted Gibson Beautiful Hold Hairspray

 To create this look:
1. While hair is damp, apply Ted Gibson Build It volumizing spray to the root of the hair. Blow dry smooth using a round brush.
2. Once hair is completely dry, curl 1-inch sections of hair, starting from the back, using a 1 or 1 1/2-inch curling iron (depending on the length of your hair).
3. Work your way to the front of your hair. Patience is key; the more curls you create, the better the results.
4. Once the hair is curled, apply a small amount of shine serum to your hands and run your fingers through your hair to break up curls.
5. Tie a hair elastic at the very end of your hair. Roll the hair under the elastic and tuck toward the nape of the neck. Be sure to spread the hair evenly in a horizontal direction, thus creating a bob. Leave sides of hair out to further create the illusion of the bob.
6. Secure with as many bobby pins as needed and apply an even coat of Ted Gibson Beautiful Hold Hairspray
Forty-five minutes to a whole new look? Sold!
What do you think? Would you try the faux-bob to fake short hair for a day? Let us know in the comments!
from: http://www.glamour.com/beauty/blogs/girls-in-the-beauty-department/2012/01/how-to-recreate-a-loose-curly.html
How to make lucky paper stars
Step 1: Obtaining paper stripes: buying

You
can buy ready-made paper stripes, they come in lots of colors and
patterns, just type "lucky star origami paper" in google and you'll find
a few online stores.
If you're just learning how to make these I would recommend you start with paper stripes that were made using step 2, which are the easiest stripes to fold.
If you're just learning how to make these I would recommend you start with paper stripes that were made using step 2, which are the easiest stripes to fold.
Step 2: Obtaining paper stripes: DIY easy
Materials

A4/Letter notebook paper, preferably yellow and without holes (like the one in the picture)
Tools for method A
scissors
Tools for method B
a ruler
an exacto Knife
a cutting board
Method A:
Take a peice of paper, and using scissors cut along the lines
Method B:
Take a piece of paper, lay it on the cutting board, put the ruler against a line and use it as a guide for cutting with the exacto knife (see the second image). This method produces better stripes.
Materials
Any paper you want, colorful A4/Letter paper, wrapping paper, anything.
Tools
a printer
Any paper you want, colorful A4/Letter paper, wrapping paper, anything.
Tools
a printer
Step 3: Obtaining paper stripes: DIY pro
Tools for method A
scissors
Tools for method B
a ruler
an exacto Knife
a cutting board
If you chose wrapping paper, or any kind of paper that is larger than A4/Letter, you need to reduce it to that size. Now print lines on it (see attached file) then cut it using either method A or B that have been described in step 2.
Tips
The wider the strip is, the longer it needs to be to make a good star.
Also, The lighter the paper is, the longer the stripes need to be.
Therefore the file attached to this step might no be compatible with the kind of paper you've chosen, so experiment a bit.
Step 4: How to make lucky paper stars: The diagram
the pretty paper stripes in step 1 came with this little diagram, it's useful, but not that clear.
If your still confused look at this video : http://www.youtube.com/watch?v=JLcqwx4pAcc
http://www.instructables.com/id/How-to-make-lucky-paper-stars/
Tuesday 11 June 2013


Friday 7 June 2013

Monday 3 June 2013
Diy: Arizona can camera

So this camera is super super cute, and it's recycling! Go green, yeah! lol. I wasn't actually sure how to make this, but I'll try my best :)
What you'll need:
> Empty Arizona Green Tea Cans (the tall skinny ones are best). You may want a few just in case you mess up the first time lol
>Can tab (another one besides the one on the Arizona Green Tea can
>Sharp knife to cut through metal
>Super glue/hot glue
Here's what to do:
1>This is the easiest step: drink you green tea! But make sure you don't bend off the can tab or the little circle thing that pops down.
2>Once you're done drinking it, rinse it out to get any tea residue out.
3>Using your knife, cut off around the top of the can, about an inch down. (see picture) This will be used as the lens of the camera. You know the little circle thingy that you push down when you open it? Push that back up into place so it looks unopened.
*****WARNING: THE EDGES OF THE CAN WILL BE EXTREMELY SHARP******
4> Do the same thing with the bottom of the can, but this part will be discarded. make sure it's cut in a straight line.
5>Then, find the side with all the ingredients and nutrition info and stuff. Cut a straight line through the can from top to bottom on this side.
6> Now you need to open the can so it's flat. Put it under a really heavy book for a while to flatten it out. It might not get completely flat, but that's okay.
7> Once it's flat, cut a straight line across the can about 6 inches up from the bottom. This will be the main part of the camera.
8> With the remaining top part of the can, cut out a little semi-circle type thing for the shutter. (see picture)
9> Now this is where it gets kind of tricky. Take your 6 inch piece from the bottom and put it face down (so the label is on the outside).
10> Fold all the edges just slightly (about 1/2 inch) over so they are straight. Then fold them over again the same way so the edges are standing straight up. I hope that makes sense.
11> Then flip it over and look at the front of your camera. It should look something like the picture. If it doesn't you probably folded you edges wrong. It should be like a little box on the back.
12> Then take the hot glue/super glue and glue the extra can tab and the shutter on the top of the camera. If there's not a ledge there, you folded your edges wrong.
13> Next, take the super glue/hot glue and glue the top of the can to the front of your camera towards the right side. If any glue squishes out, you can wipe it off with a wet paper towel.
ANDDD you're done! The back might not be too glamorous, but it should stand by itself and there won't be any sharp edges exposed.
If you have any ideas for improvement, please comment! And if you actually make this, tell me how it goes!
Bye/from: www.polyvore.com/diy_arizona_tea_can_camera/set?id=48666602
Subscribe to:
Posts (Atom)